


Maybe I should just start titling my posts with random memes. Have I mentioned that I find internet humor to be a thing of beauty, a performance art, an entirely new form of creative interaction for humanity, a revelation of the profound cleverness of the anonymous masses and, finally, a butt-load of awesome sauce?
Changing gears...
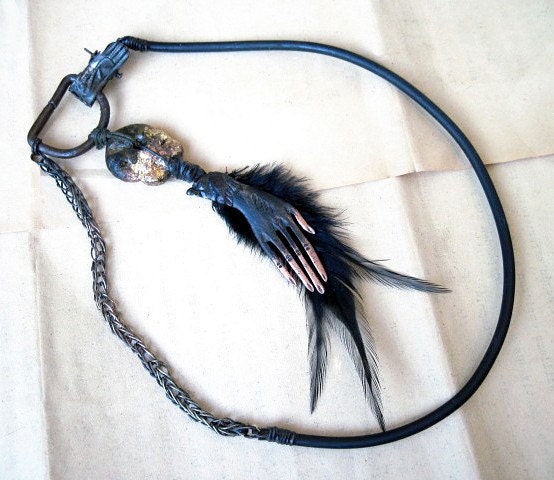
 I'm sure you girly girls will like this. I did try to balance it off with the cording.
 Re: your questions-> Are we talking beading wire? Like Beadalon and Soft Flex? I've never found one type or brand to be better or worse, though some is thinner. What does make a difference is the glue. You have to use G-S Hypo Cement. It's amazing in tiny spaces, though useless for anything bigger. You can also use crimp covers and all that. I never remember to get any so I end up winding wire over the crimp. I really should get some.
Speaking of crimp beading. This here.


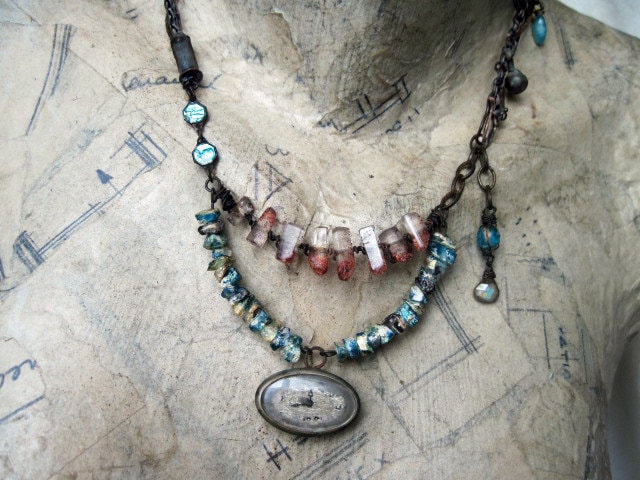
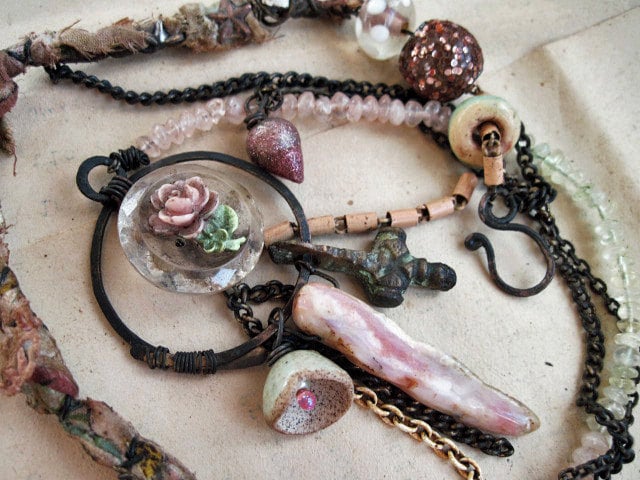
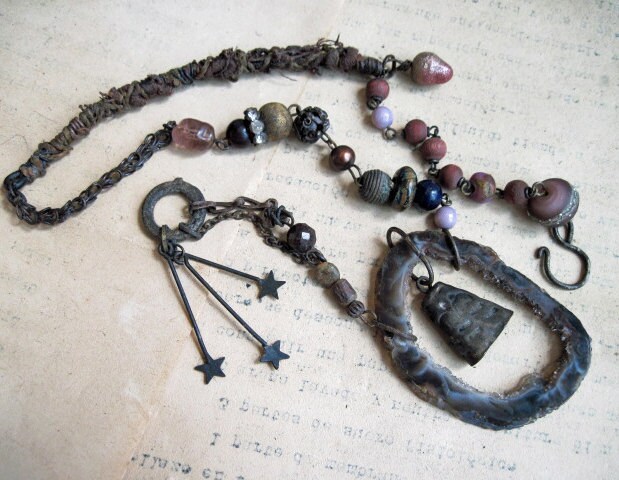
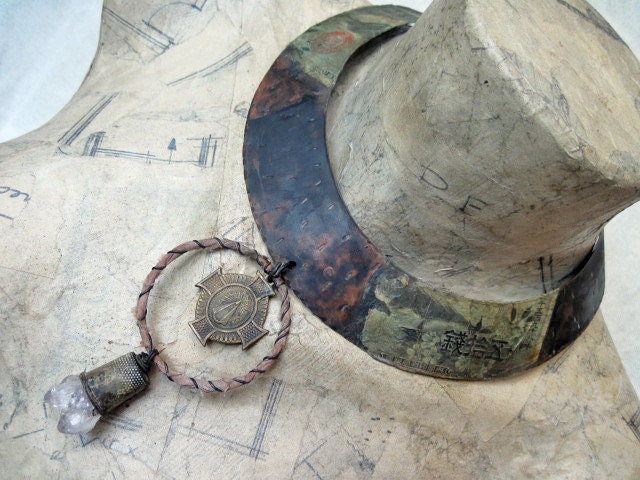
 Here I hammered the crap out of some copper wire, I think it was 14 ga, then soldered it together for a coin bezel. I then oxidized. I'd done so much dremel filing to get the excess solder off that my copper had a lot of 'tooth' for the oxidizer to get into, that's why it looks so dark. But then it was murky and young Elizabeth wasn't very visible. So, I eeever-so-gently buffed her down with some fine steel wool. But then too much of the coin got buffed too and looked very red. I tried carefully re-oxidizing just the spots I wanted, which worked, but not that perfectly. So, I tried out a new purchase- black alcohol ink. It's quite potent. I thinned it some with rubbling alcohol. In fact, the colorful necklace above was my 1st alcohol ink experiment. I shmeared it on the eyeball-searingly bright yellow glass.
I've had a recent fixation with that color:

 It's just such a surprise neon pop. Another way to balance off the dour antique hardware. And the brights are rather tribal, in a Bollywood way.
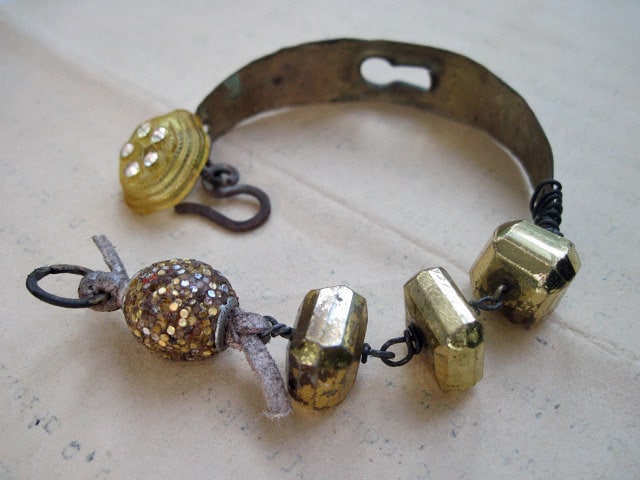
And, guys, it took me, like, 3 hours of hammering to get this thick piece of bronze to bend. I didn't have the guts to try heat again. I was able to inaugurate my other new tool- a mini anvil! Though after the 3 hour beating, it doesn't look this pristine any more. But it did have me hammering spoons and things- super fun and really works. You'll see in some upcoming pieces.
Here's this hot mess:
 I over thunk it in my attempt to do something with some square bits. So actually, from fussing so much, I broke the link of the glass frame part. So. Back to the solder.
 Oh but the soldering gave me an opportunity to bust out my new this guy:
 My new 'Helping Hands'. Which are pretty awesome but not for something with lots of different parts to solder. Why? Because, as you heat and attach your second or third parts, the solder is liquifying on it all so your first or second parts are dropping off. So next time I'm busting out my new:
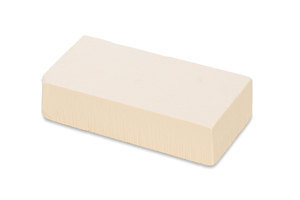 Magnesia Block. And just soldering on that. And I'm going to remember not to fold the little tabs til after the coin is inserted.
 That's it for today. Hope you enjoyed. *curtsies*

Changing gears...
I'm sure you girly girls will like this. I did try to balance it off with the cording. Re: your questions-> Are we talking beading wire? Like Beadalon and Soft Flex? I've never found one type or brand to be better or worse, though some is thinner. What does make a difference is the glue. You have to use G-S Hypo Cement. It's amazing in tiny spaces, though useless for anything bigger. You can also use crimp covers and all that. I never remember to get any so I end up winding wire over the crimp. I really should get some.
Speaking of crimp beading. This here.

Now this right here is waxed polyester cording. It's very strong but also slipper. So I also dab that glue on the knots and then cover them with wire. It's my own thang.
In any case, for both of these necklaces I had to drill head on through a copper rivet to detach this from its original home.
Here I hammered the crap out of some copper wire, I think it was 14 ga, then soldered it together for a coin bezel. I then oxidized. I'd done so much dremel filing to get the excess solder off that my copper had a lot of 'tooth' for the oxidizer to get into, that's why it looks so dark. But then it was murky and young Elizabeth wasn't very visible. So, I eeever-so-gently buffed her down with some fine steel wool. But then too much of the coin got buffed too and looked very red. I tried carefully re-oxidizing just the spots I wanted, which worked, but not that perfectly. So, I tried out a new purchase- black alcohol ink. It's quite potent. I thinned it some with rubbling alcohol. In fact, the colorful necklace above was my 1st alcohol ink experiment. I shmeared it on the eyeball-searingly bright yellow glass.I've had a recent fixation with that color:

And, guys, it took me, like, 3 hours of hammering to get this thick piece of bronze to bend. I didn't have the guts to try heat again. I was able to inaugurate my other new tool- a mini anvil!
Though after the 3 hour beating, it doesn't look this pristine any more. But it did have me hammering spoons and things- super fun and really works. You'll see in some upcoming pieces.Here's this hot mess:
My new 'Helping Hands'. Which are pretty awesome but not for something with lots of different parts to solder. Why? Because, as you heat and attach your second or third parts, the solder is liquifying on it all so your first or second parts are dropping off. So next time I'm busting out my new:Magnesia Block. And just soldering on that. And I'm going to remember not to fold the little tabs til after the coin is inserted. That's it for today. Hope you enjoyed. *curtsies*
 Oops. Forgot this guy.


11 comments:
Thanks for sharing some really interesting techniques. Love the coin bezel. Have not tried bending bronze door/furniture fittings, but coins required a MAP torch a no8 sledge hammer and the arm of a 60 year old bulldozer.
Young Victoria is gorgeous. You're putting your new tools to good use, much to our delight.
My crazee assed movie trivia contest winning bracelet arrived today and girls and gals to view up close and personal the magical devices of fanciful is something to behold in the flesh... Somehow even a bead cap becomes a vessel... A portal into the beyond.
.. And a box filled to the brim all for me...Mucho gracias.
The new stuff is fabuloid.
The soldered coin bezel necklace is beautiful! Thanks for taking the time to break down your process, and explain what goes on behind the scenes of your fanciful work. I like the results of the alcohol ink, your new anvil looks cute.
Hello Dollar Bead.
I love the way you set the portrait apart on the coin--really brings out the sense of a cameo. I've never thought of coins as cameos before, but this makes me think it was so obvious all along. Now I want to paint the background coral and the portrait a cream to see what that's like.
Yellow is always my favorite bright as well. My friend turned me on to all these foreign versions of project runway a few years ago, and in one of them they've got guest designers as part of a challenge. they bring out their final piece in their mini runway show and it's this crazy neon yellow wedding dress that was so beyond anything. That cemented bright yellow for me. It's so perfectly cartoonish, and can't really be taken seriously, so I love using it juxtaposed with more 'serious' components.
It's queeny's diamond jubilee over here and I'm sure she'd love your necklace, but probably not too happy to share a page with what, what, in the butt...Love the colours in your bracelet and my tip is to use crimping pliers, they're cheap and work every time.
Your first alcohol ink experiment is really interesting and the result is impressive !
The more I see your work, the more I want to do things myself. ^^
Everything is gorgeous! I'm always drooling over your fabulous grungy pieces, yet I can't seem to drum up the courage to try and make some myself. I enjoyed seeing all the different techniques you used. I love that little red anvil, but I fear my arms are too puny for anything like that. Just ask my husband who gets frustrated when I ask him to open jars and pick up 'heavy' things. He makes it look so easy.
I bow down in humility to your fearless creative spirit as always!
Wonderful new work, as usual! Ah, so there is something I can do with that drawer full of hardware!
If you're experimenting with the alcohol inks, try this one... if you feel like your ink is too heavy, throw a capful of the extender that comes with the set on it. The inks will clear in some places and pool in others. You never know what is going to happen. I love surprises like that.
I don't know where you got the alcohol ink idea, but, since I mentioned it in my post with your grandbabies in it, I'm going to take credit for influencing you and feel super proud of myself. That yellow is yummy.
Post a Comment