


I'm so glad you guys enjoyed the steps! Tho I was hoping someone would have a magical fix for that last piece... But yeah, I'm constantly messing up and fixing and fiddling.
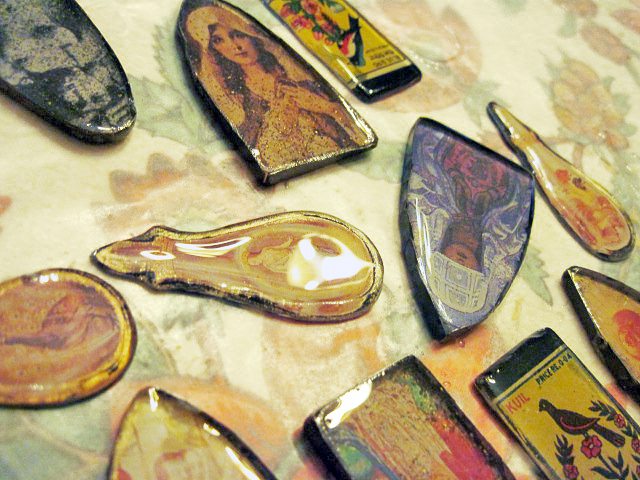
So after a ton of sanding and edge-cutting these look like this. I did the sanding outside with coarse sandpaper and dremel. Resin powder flakes everywhere and my house is bad enough, as you know. Weird storms for several days in Chicago so it was all muggy and I was covered in tiny insects. Felt a tickle, looked down my shirt and found a fat spider wiggling on my boob.

Didn't even realize I had the right amount for two earring pairs here.I think I'll match the queen with the peacock and king with dragon.

If not everyone's facing wrong and the colors don't combine.
I must've had this all planned when I cut these out ages ago before getting distracted by other shiny objects.
Yay, creative ADD. The shrines in tin, after all this sanding, need some oxing.
After that, another resin batch is stirred.... I should mention a note about that. You need to stir the crap out of resin, until all the silver threads that appear when you stir are no longer visible. This takes a long time. Also, it produces lots of bubbles. To get rid of bubbles I blast it with a heat gun. Thing is, that releases a lot of very dangerous gasses, so I make sure to do this outside and aim my face away.

After these cure it'll be time to buff them with polishing cloths to get rid of that glaring shine.
Mr. Devices is downstairs watching a "cult classic" (read: old and indescribably stupid) horror movie. The sounds reaching me are like a caricature of horror movie sounds. If you tried to produce sounds to make fun of horror movies you wouldn't go this shlocky. But then, that's also how I feel about his heavy metal. Ah, wedded bliss.
Can we stop now and turn to the comment Kimberly aka Numinosity Beads made?
"I love seeing your process along the lines of never give up on a piece and magically resurrect it.
Speaking of resurrection, it reminds me of something my son once said when he saw a religious sign on a lawn about the resurrection. He asked me what resurrection meant and I tried to tell him best I could and he then said "oh, I thought it meant boner" and wondered why it was posted on the neighbors lawn. He capped it off by saying the thought maybe it was a hooker house. He was 8 at the time."
...
*crickets chirp*
Next day, resin is all cured.


 If you apply it over non-buffed resin it tends to glob up. Here's the best pic I could get of that, though really you can't see it here and you're all gonna think I'm nuts. Believe me, if I could skip the buffing I would. And do sometimes. Conversely, the wax can actually polish your un-buffed surface as well. So there's that.
 Here's a comparison before and after de-shining.
 Quite a difference.
 So this one has both issues. Over-zealous buffing in center, high and shiny edges. I sanded the edges and globed on some wax. Removed excess with regular cloth. In fact I use some of my scrap lace and such that will later be incorporated into something. Cuz a little dirtying with wax and whatnot builds character.
 Logically, I should have an after picture of the shrine above, but instead here's my dremel tip making holes.
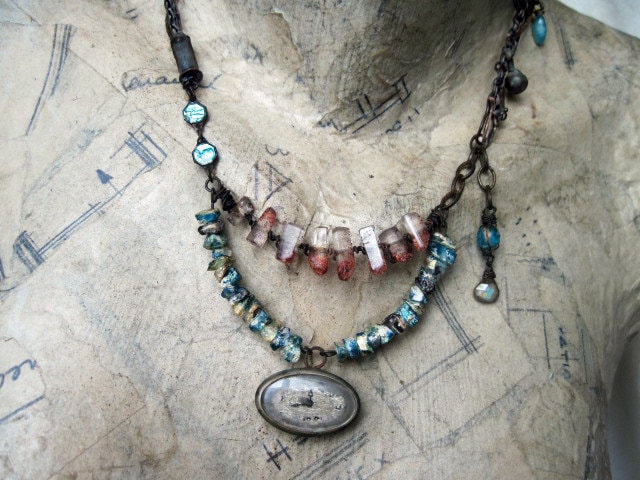
 Added wire for bails but don't know yet if these will include a bead or be attached to a closed circle, so I haven't finished them. The king in space can be mounted on a piece of tin with some cheaty wire prongs since it's just on paper. The royal angel mutants at the bottom center might make an earring pair too. Some of these might even be hung from a pin as a brooch. Many options to consider...

As I'm using 3M Polishing Paper (on ebay I found a pack of just the coarsest green sheets, which is what I use) I'm brining the un-oxed tin back up. So that'll need re-touching.

As you can see it's the edges and corners that give me most trouble.

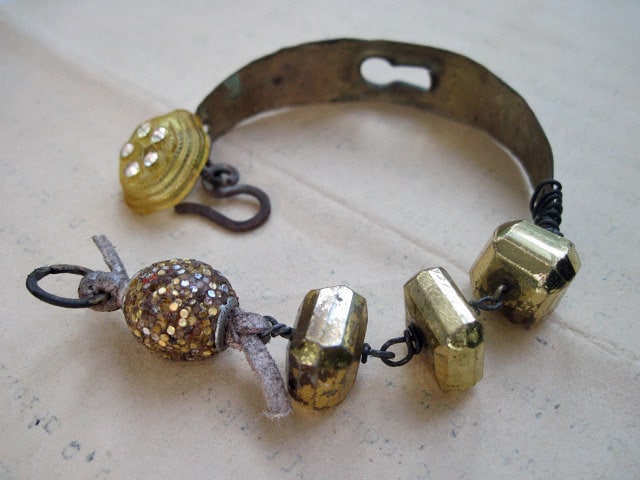
Here's another. I fix this with regular sandpaper and paste wax.

The paste wax also smoothes out any over-zealous buffing and also de-shines the resin.

 Here's a comparison before and after de-shining.
 Quite a difference.
 So this one has both issues. Over-zealous buffing in center, high and shiny edges. I sanded the edges and globed on some wax. Removed excess with regular cloth. In fact I use some of my scrap lace and such that will later be incorporated into something. Cuz a little dirtying with wax and whatnot builds character.
  Logically, I should have an after picture of the shrine above, but instead here's my dremel tip making holes. Added wire for bails but don't know yet if these will include a bead or be attached to a closed circle, so I haven't finished them. The king in space can be mounted on a piece of tin with some cheaty wire prongs since it's just on paper. The royal angel mutants at the bottom center might make an earring pair too. Some of these might even be hung from a pin as a brooch. Many options to consider...
But all this would be so much easier if I could just wait for the resin to thicken up before pouring. I'm going to focus on that next time.
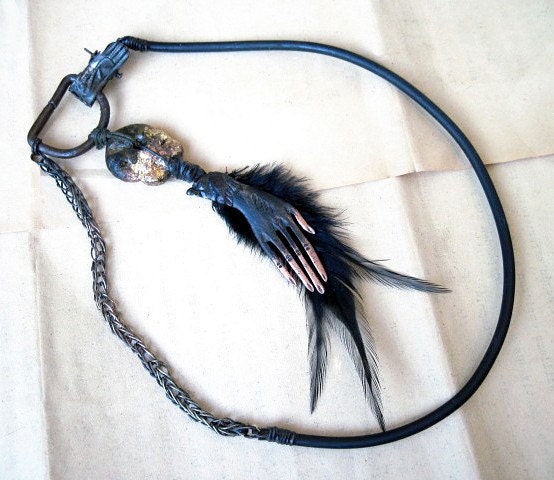
Turning now to further developments in owl-petting news.


11 comments:
Thank you SO much for your step by steps! I have never tried working with resin, mainly because I don't like the shine that I see when most people make things with it. Now I know that something can be done about that! I always thought you would ruin it if you tried to sand or polish it. In fact, I have a pendant that I bought on Etsy that I don't wear because it is shiny. I"m going to fix it right now! Woo! You have opened up a whole new world...
HAHAHAH she said "boner".
whaaaaaatt??i have the sense of humor of a 15 year old boy :P
i hate buffing resin. pain in the ass. I get those crispy sharp edges too but i just take the tape off and add another layer of resin to make it do a dome. If you let the resin sit for a bit it won't be as runny and it'll stay and make a dome. But it's a bit of a risk. but damn i'd rather take the risk than do all that sanding :(
always enjoy reading about what you're thinking as you go through the different processes it takes to makes your jewels. These resin pieces are already fascinating and you've just begun!
I suppose I could have done a better job of explaining that I said "no, that's erection, dear" and maybe it would have been more clear however offtrack my comment was. We all get a chance to derail over here on fanci's blog...our safe place. Notice I don't tell an embarrassing story about my child on my own blog. I did go back to edit or delete but it wasn't posted the couple of times I looked so it was meant to be apparently.
Whenever I hear about resin and bubbles i want to run the other way instead of trying it out but then I realize that descriptions of processes tend to make things sound much harder. I noticed that when I was writing up a description of my own fairly simple process one time. I sure like your pics of the all gathered up and looking all finished-like.
I hope you are wearing a mask when you do all that sanding - not a clown or batman, but some breathing protection from the dust. We all need to remember to do that with any kind of sanding!
I love the shapes you've made for the resin and the great images. Thanks for sharing your process and letting us see the ups and downs on the way to your wondrous end products.
i love sharing and step by steps. the creative process is truly amazing and watching each other is awesome. thanks for sharing! and kim. bwahahaha!
You are a gift. Your minions bless you again for the pics, the clear explanations of process, and the problem-solving insights. We know that it was a flaming ton of work.
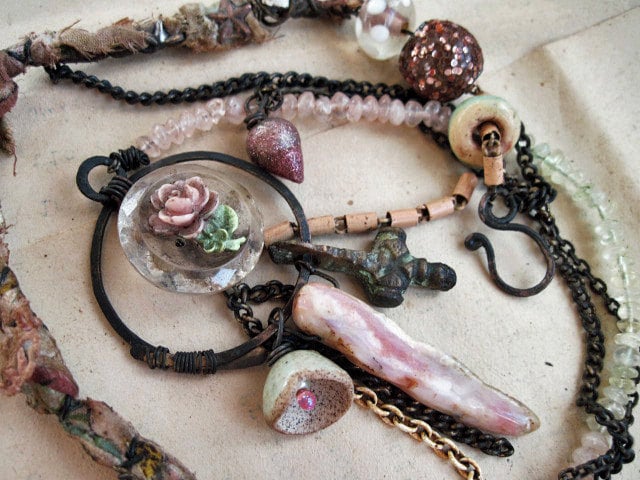
Very enjoyable step by steps. Love the last pic of the almost dones. Beautiful !!
You are SO generous with your sharing, as usual. I've shied away from resin myself, but your guidance will now see me through.
A million thanks- especially for all the pics and real talk.
This is soo well-timed: when you first mentioned you used foil on a the tarot earrings, I tried it and it leaked and fogged up the perfect side of a pendant... Didn't think of sanding, waxing to fix it. Thanks for the re-motivation to deal.
Also- since the foil pulls the resin away from the center, hoping that after pulling all the foil off, a second app of resin will pool back up... thanks!
Great post, as usual - enlightening, entertaining and inspirational. Thank you and your ADD.
Post a Comment